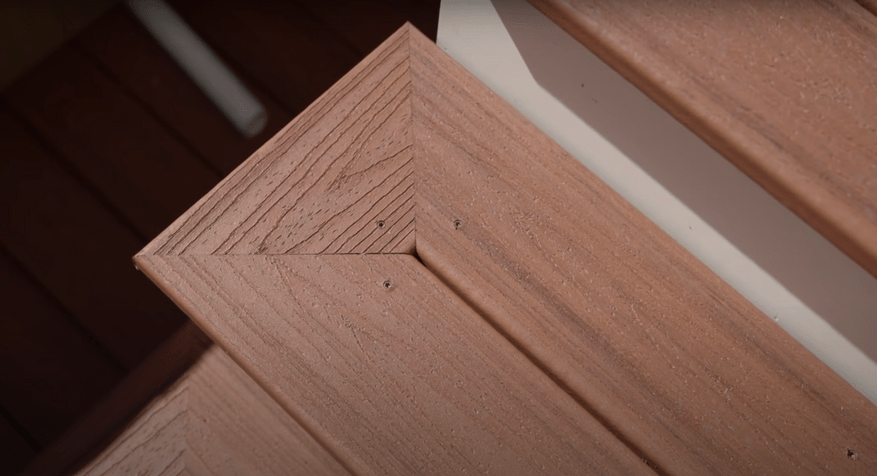
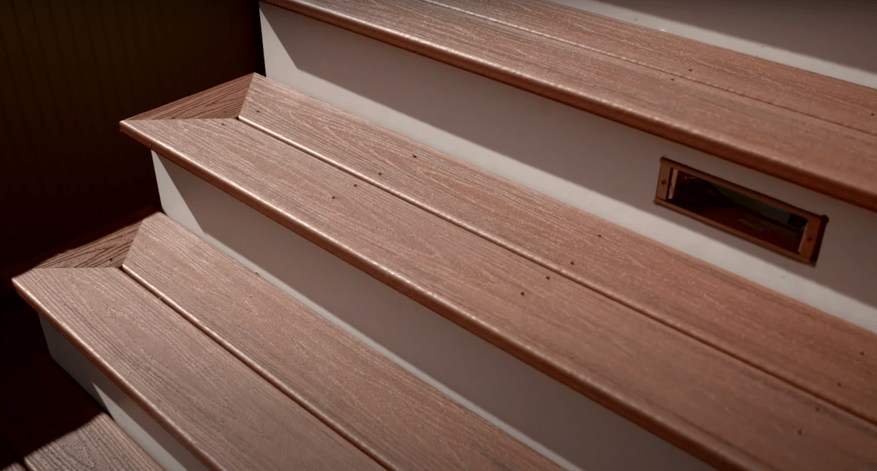
When building a stair tread, the typical method is to simply cut the end to the appropriate length and mount the piece onto the stairs. Unfortunately, a composite product can leave an unattractive appearance at the cut edge. Leaving this edge exposes a sloppy, unprofessional appearance.
This problem can be solved using the “picture framing” method. With this technique, deck stairs made from composite material can hide their cut edges and maintain an elegant appeal that shows pride in craftsmanship.
Step by Step: How to Build a Better Stair Tread
To start the process, you first need an impact driver, a drill (preferably corded), screws made for cap composite decking material, a miter saw, and a tape measure. You’ll also need standard safety equipment, including safety glasses.
Note: Throughout the process, check the video from Gray Daley for visual demonstrations.
Step 1: Cut the Stair Pieces
First, you need to cut two deck pieces to the exact length. Cut the pieces at a 45-degree angle on each side. The pieces should be cut so the result is one length shorter than the other. When both pieces are placed together, there should be a triangle-shaped notch in the middle, on both ends.
Next, cut two triangle pieces with a 3/16th surface on the top corner.
Pro Tip:
Take care to cut the pieces to exact matching lengths to create a flush, symmetrical appearance.
Step 2: Prepare for Connection
Before connecting the four pieces, drill a small hole for the screws. With a small drill bit (to match the screws) drill a hole at an angle of 15 to 20 degrees, pointing the hole into the larger deck pieces. Now bring the pieces together and drill a hole, following the original, into the larger portion of the main board.
Pro Tips:
Keep a firm grip when drilling both pieces to prevent them from shifting out of place.
Scrape out debris as soon as possible.
Take a screw and push it through the holes to clear any remaining debris.
It’s important to drill the holes one at a time to remove any debris that will cause the pieces to separate and prevent a clean, flush, tight connection.
Step 3: Connection
Now it’s time to connect the pieces. Line the small triangles at the end of the two longer pieces so they come together to form a rectangle that covers the stair. Hold firmly and screw the four parts so your picture-frame stair tread is ready for placement on the steps.
Pro Tip:
Drive the screw until the head sits just below the surface. Don’t leave it sticking out.
Step 4: Placing the Tread
To secure the picture frame stair tread, secure blocking at each end of the steps. This will create a platform to secure the picture-framed stair tread. Now orient the tread to the structure of the stairs and fasten it down with screws.
Pro Tips:
Follow the screw pattern shown in the video (roughly 4:25) to ensure that the corner of the triangle (at the end of the stairs) sits flush with the longer boards.
Do not drive any more screws on the end. The pieces have already been attached to create the picture frame and will hold firmly together.
Once complete, you have a stair tread that will make a homeowner proud!
Discover the Best Fasteners for Your Project with FastenMaster
Picture frame stair treads are a fantastic solution for your project, but it takes the right tools, methods, and fasteners to see the dream come alive. If you need more tips on deck building, or need the best materials for your next project, visit FastenMaster today.


